VSCO: Photo & Video Editor
Experiment with 200+ high-quality presets
Download

Collage

Make a collage out of photos and shapes in seconds

Product Feature
September 1, 2022
Create a collage in seconds with a pre-set template or start with a blank canvas to compose what you imagine. Customize your composition with photos, shapes, colors, and sizes.

Making a Great Collage on VSCO

First off, let’s explore some of the ways images can be combined to create a collage.

1. Use multiples of one image

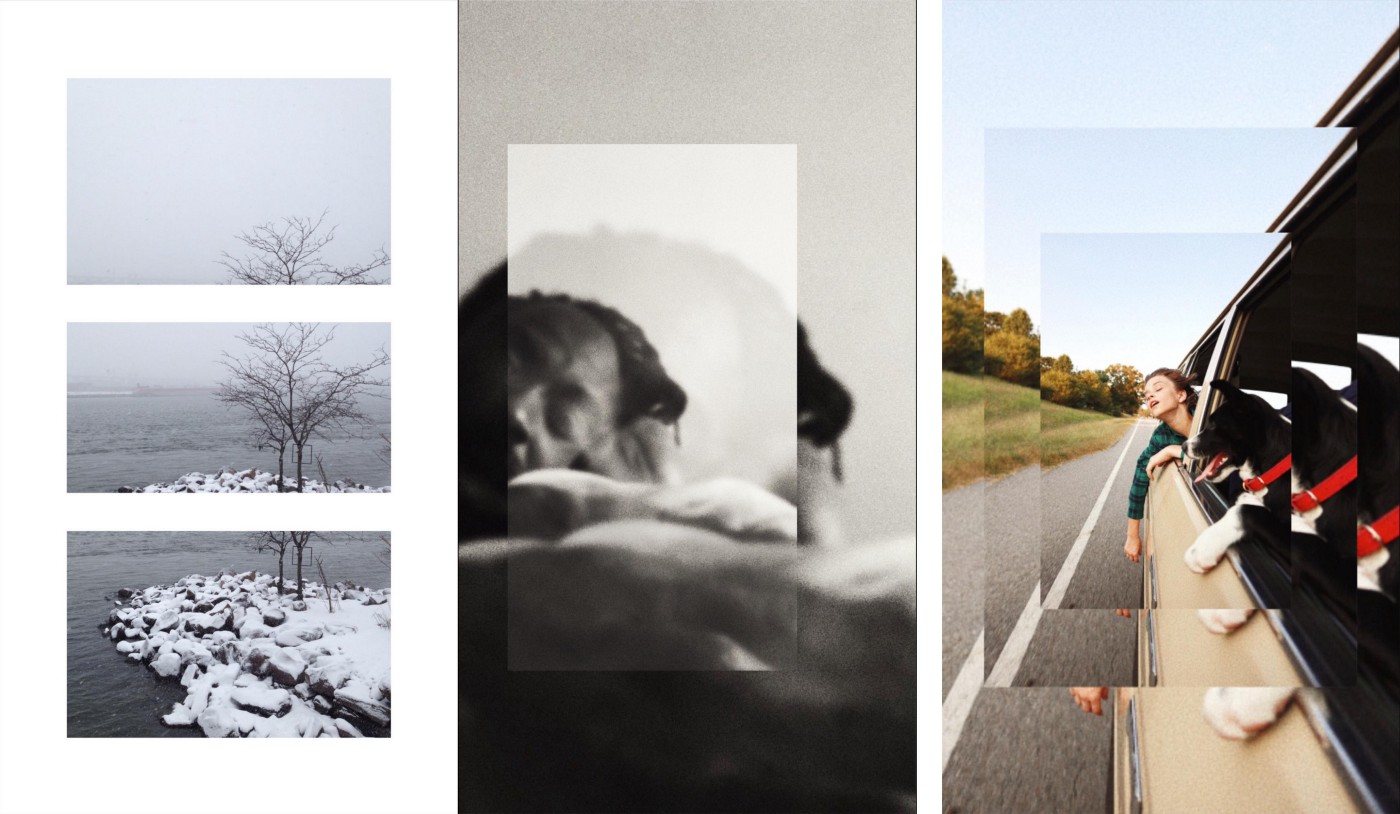
To get started, let’s take just one image and make something interesting out of it. By repeating the image with variations, we can create all kinds of interesting outputs with a single image, much like Warhol’s Marilyn Diptych mentioned above. The image can be flipped, mirrored, recolored, blended, or even just stacked in an interesting way to create something engaging.

A collage of images
Left: ckjoh

Additionally, a single image can be edited in multiple ways while remaining a single image in appearance.

A collage of images
Middle: 12amsunshine, Right: neeeeeeeesh

2. Use similar images

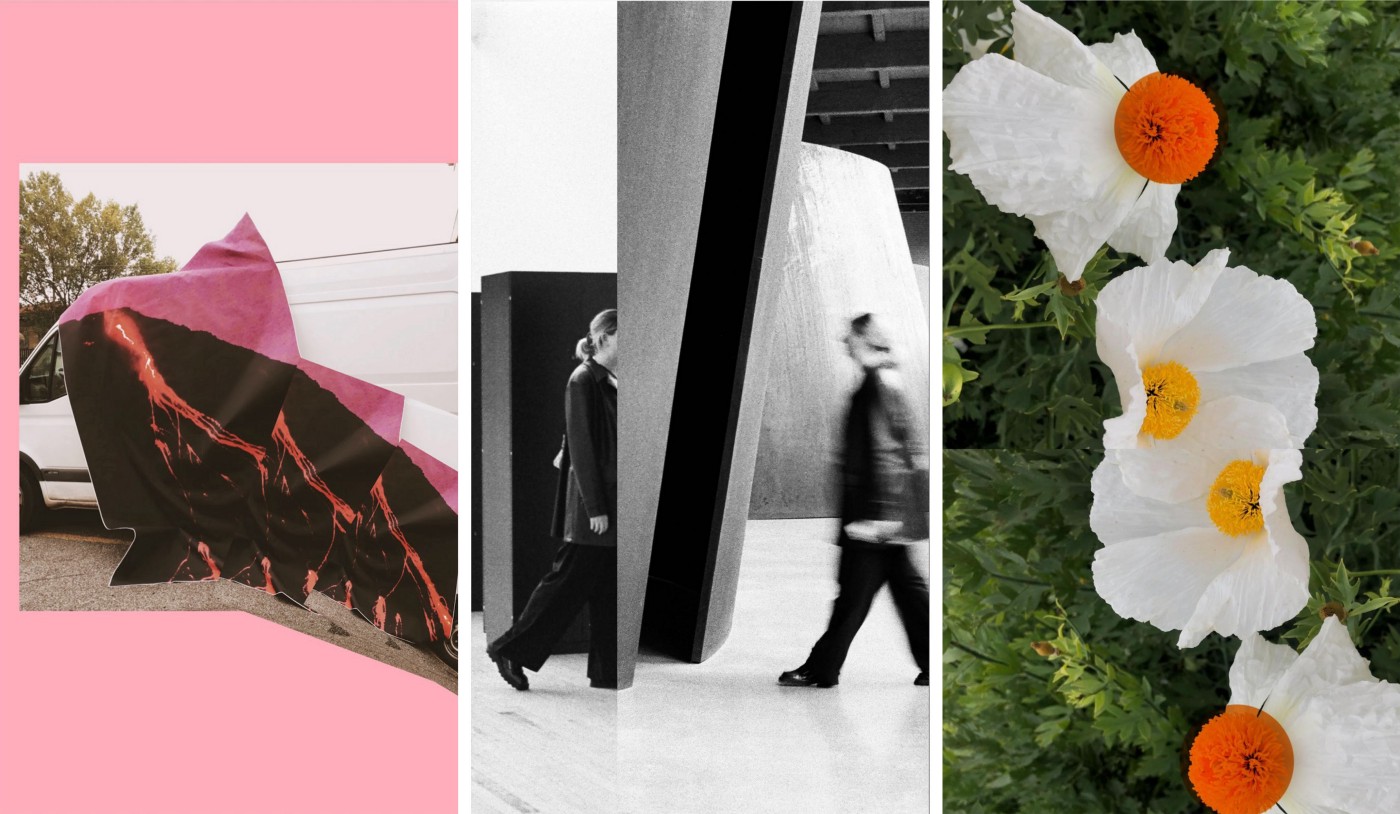
Bringing similar images together is a common use of collage, and can be used to tell stories or emphasize a particular feature of a set of images.

A collage of similar images
Middle: -trevor, Right: kylehale
A collage of similar images
Left: krismendoza, Middle: rollinglemondonut, Right: sshiohara

3. Juxtaposition of contrasting images

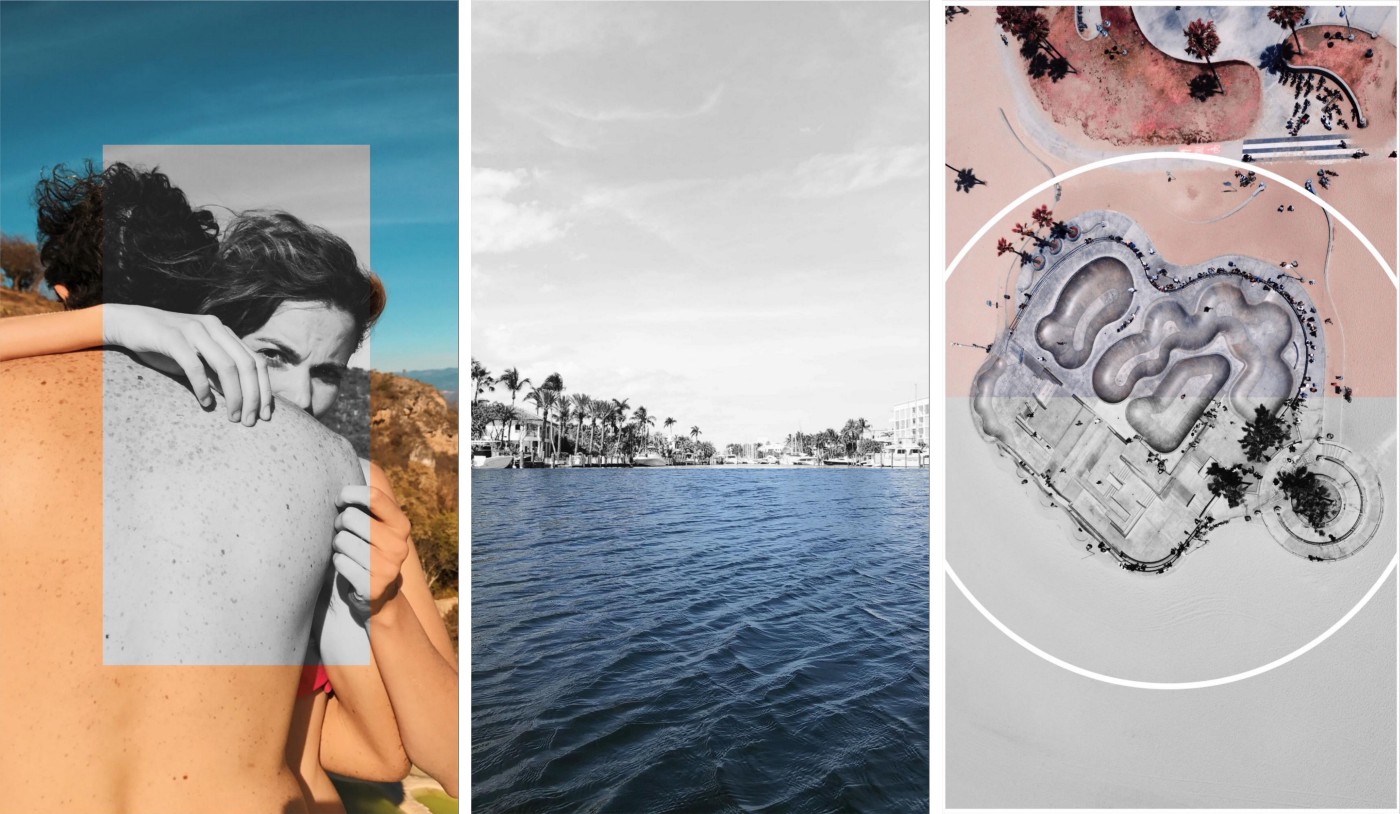
Combining seemingly unrelated, or even opposing images can be a very powerful tactic in collage creation.

A collage of contrasting images
Middle: 12amsunshine

(It’s worth noting as well that a double exposure effect can easily be created this way using the opacity tool.)

4. Continuing lines across images

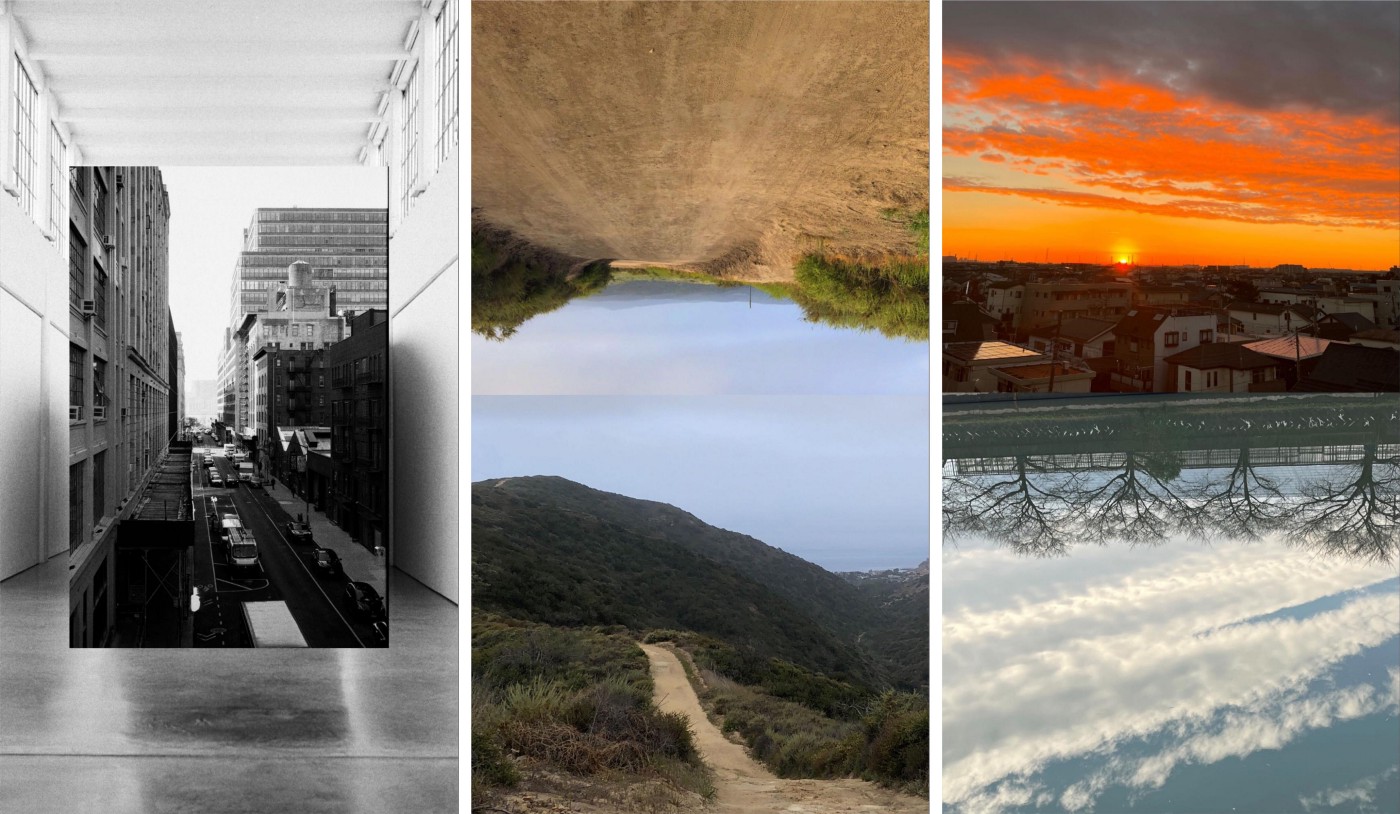
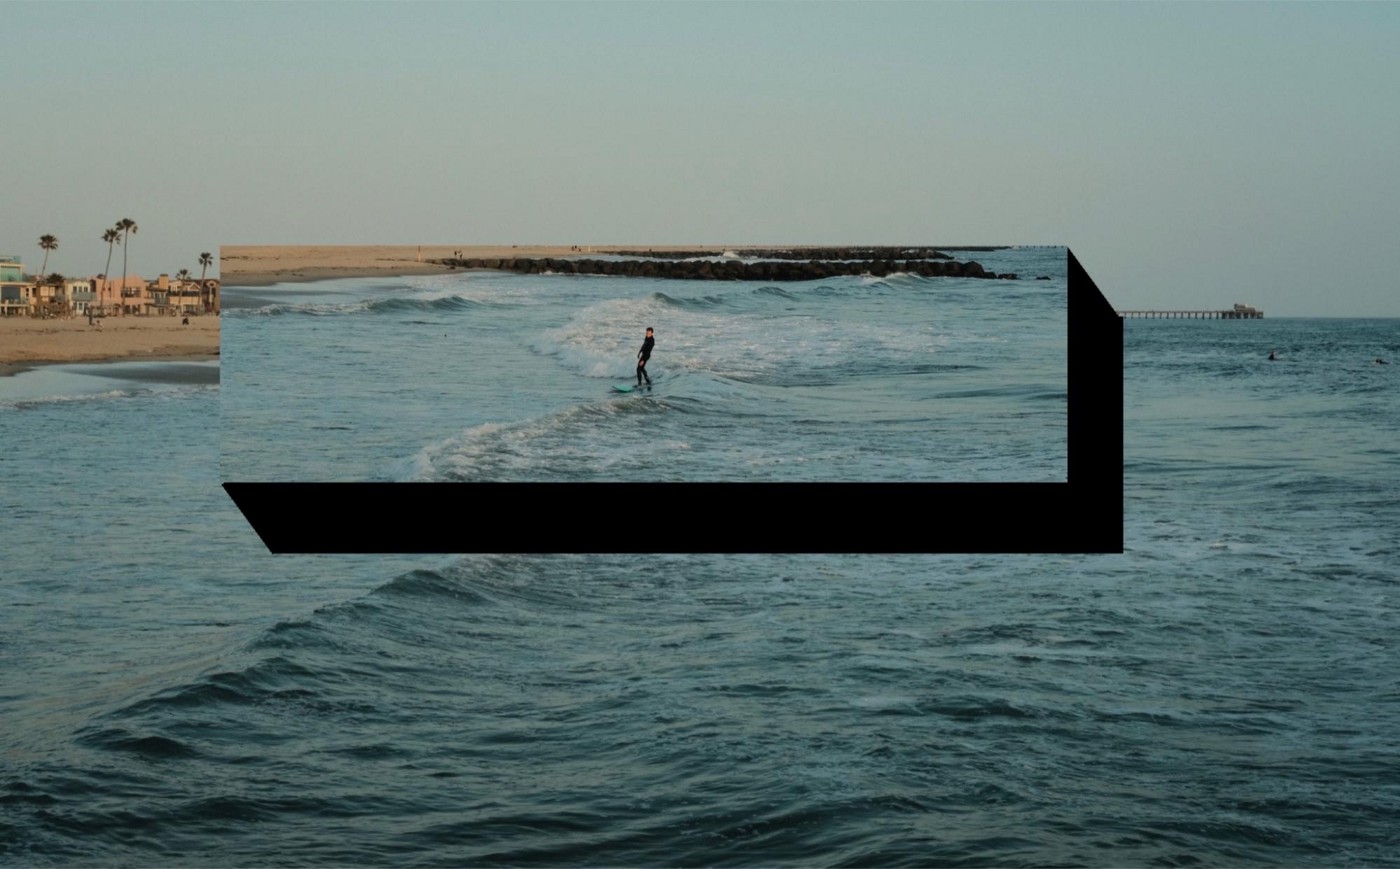
A less-used trick is to create forced continuity between images, such as continuing a line or object between them

A collage of forced continuity between images
Middle: krismendoza, Right: 12amsunshine

Shapes & Colors

Now, let’s look at how shapes, colors, and gels can elevate collage, or even be the entirety of it.

1. Analogous or Complementary Colors

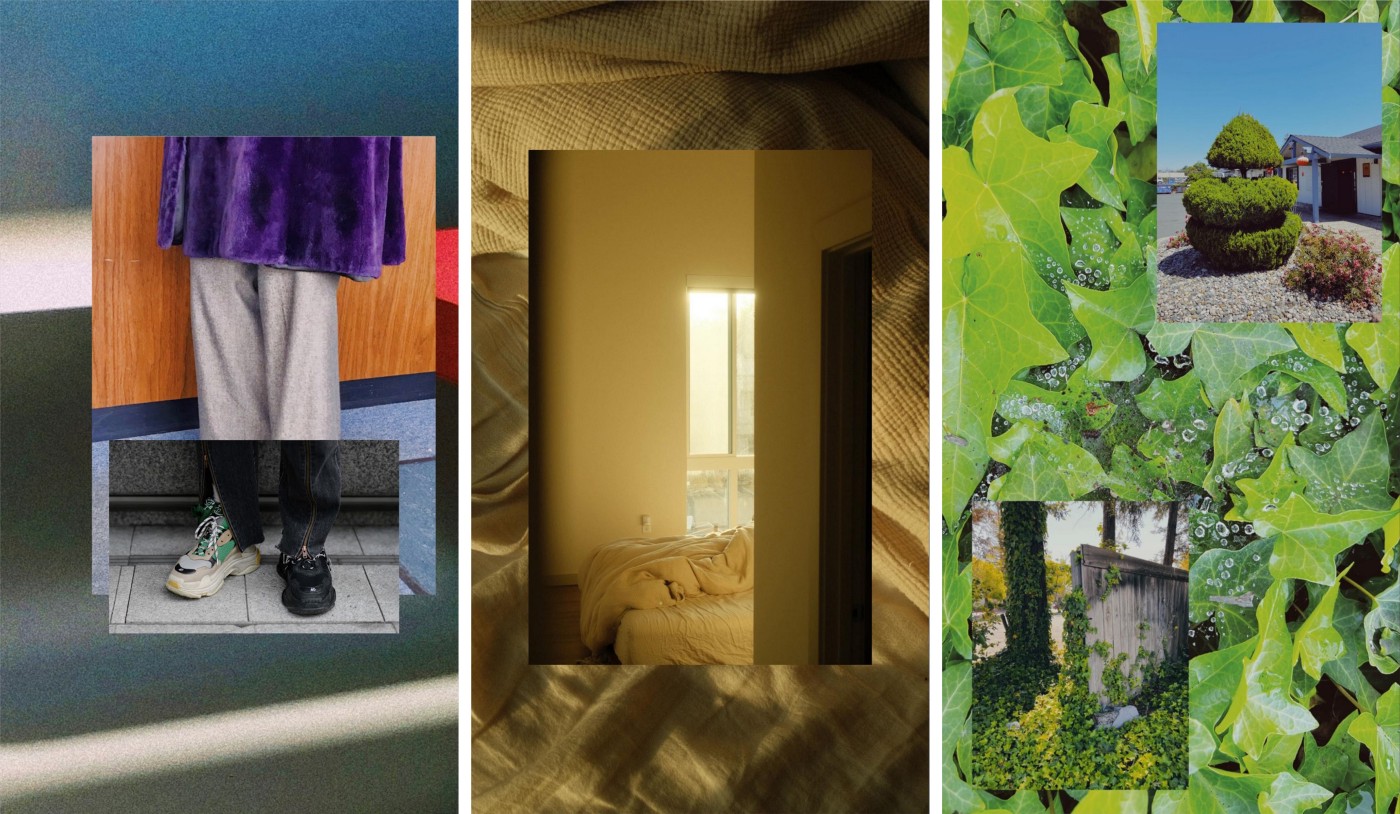
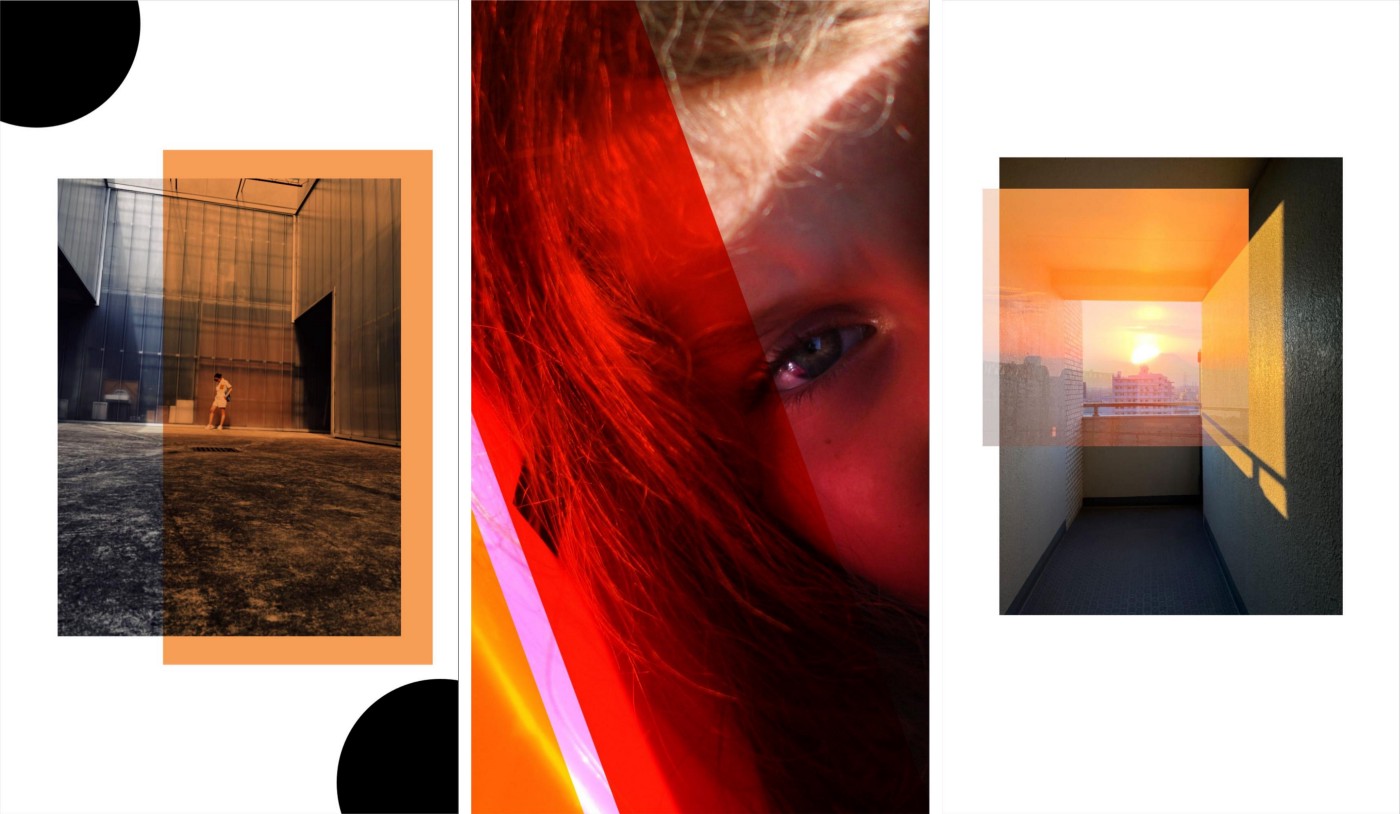
Though a white or black background is absolutely classic, a colored background can interact with the colors in an image in powerful ways. By choosing a similar colored (analogous) background to a color in the image, that color becomes emphasized even more. By choosing a complementary color (opposite side of the color wheel) for your background, you can add a dynamic color relationship to an image and transform its impact.

A collage of analogous or complementary images
Middle: ulm3, Right: katyento

2. Shapes as gel overlay (part or entire image)

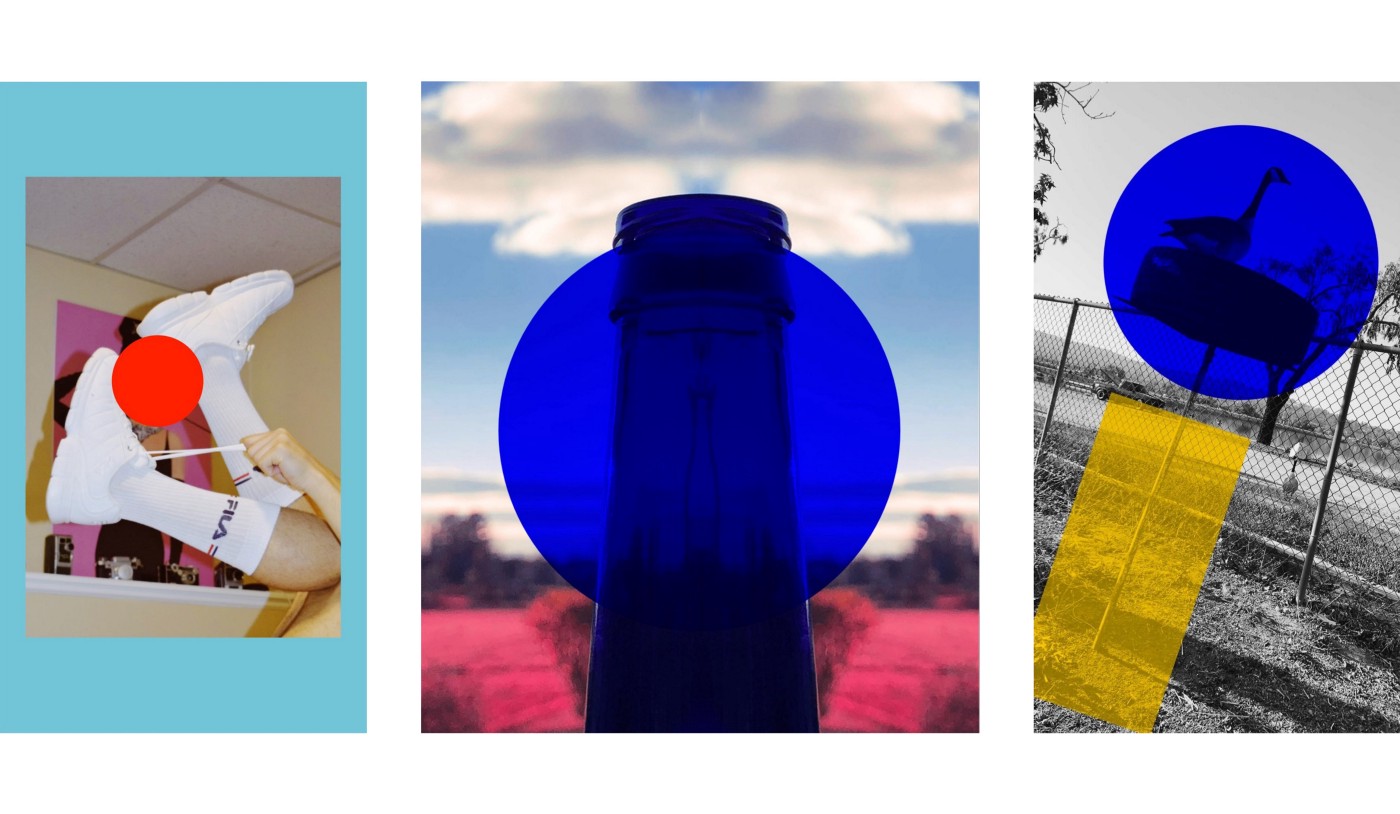
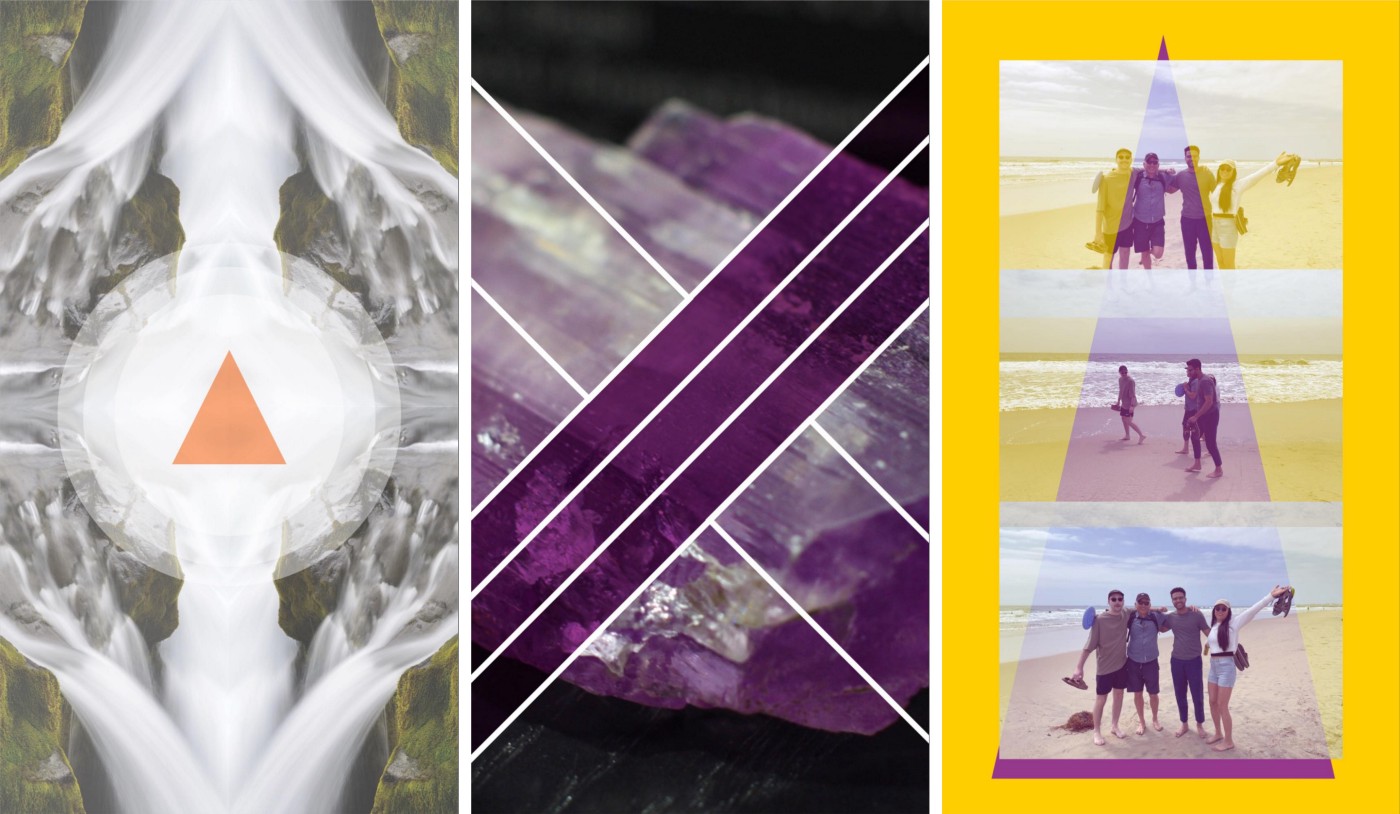
Overlaying colors in the form of shapes pays homage to the collage art form’s roots in combining materials. By placing a shape over an image (or another shape!) and adjusting the opacity, a color gel effect can be achieved.

A collage of images with shapes as gel overlays
Left: ehidiamen, Middle: ulm3, Right: sshiohara

3. Shapes as design elements / solid or gel

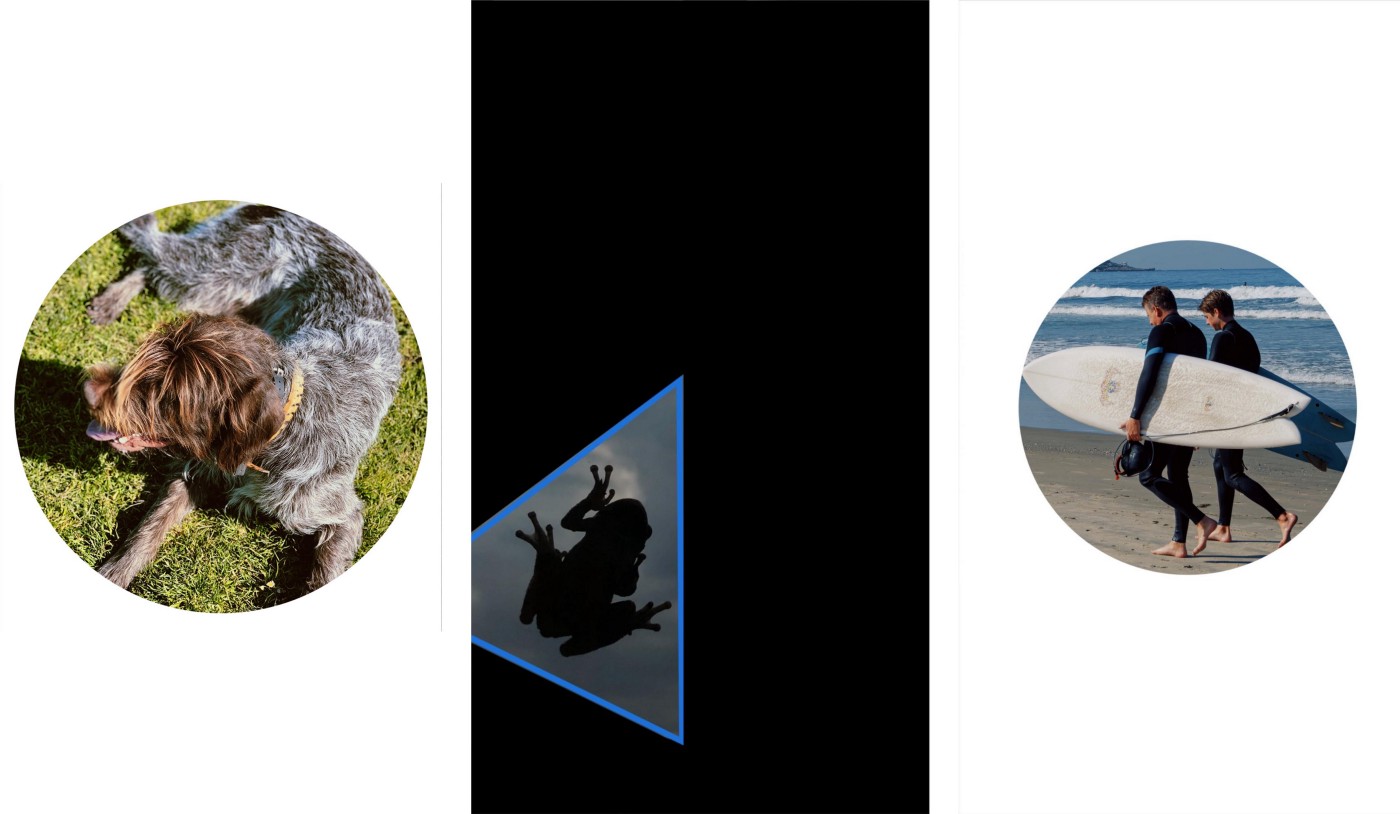
Shapes are the foundation of design, and they can be combined to great effect in the Collage tool, not just as overlays, but as key design elements.

A collage of images with shapes overlayed as design elements
Left: pawtuckaway, Middle: ulm3, Right: brentlyjr

4. Frames to focus attention on an area of interest

By swiping over the shapes picker, hollow shapes can be selected, and these can be powerful framing tools to draw attention to various elements in your collage.

Middle: kruser4, Right: ulm3

5. Shapes to add abstraction or obscure part of an image

Lastly, instead of being graceful companions to your images, shapes can be aggressive abstractors to obscure part of an image for a focused, or even jarring effect. John Baldessari famously used this technique in his work.

Left: ericwittman, Right: henrymly

Here is what’s changed:

  1. Collage now exists as a separate mode from Montage. It includes all of Montage’s capabilities, but removes the timeline aspect, freeing up more screen real estate for nuanced editing. It also elevates templates for better inspiration and starting points.
  2. Montage now defaults to full-screen, sequenced media to better utilize the time dimension of this tool. You can still use it to create collages, but it makes the creation of multi-clip video, photo dumps, and slideshows easier by default.
  3. The studio now has a top bar with starting points for Collage and Montage (as well as the camera). Rather than requiring you to choose your media first, these new starting points will guide you through the creation process more easily.
    – Collage will open up the template picker where you can choose from a variety of creative layouts to fill in with your own images.
    – Montage will open a sequenced media picker, helping you to determine the order of your media as you choose it.
ui showing college editing
Template selection from the Collage starting point (no image selected)

Collage tool basics

Focusing in on the Collage tool, many images can be loaded into the tool and each one can be resized, repositioned, and rotated through two-finger pinch gestures. Additionally, images can be resized and reshaped through the circular handles that appear on them when selected. While moving images, a grid appears to help with alignment across the composition.

ui showing college editing

Default Menu

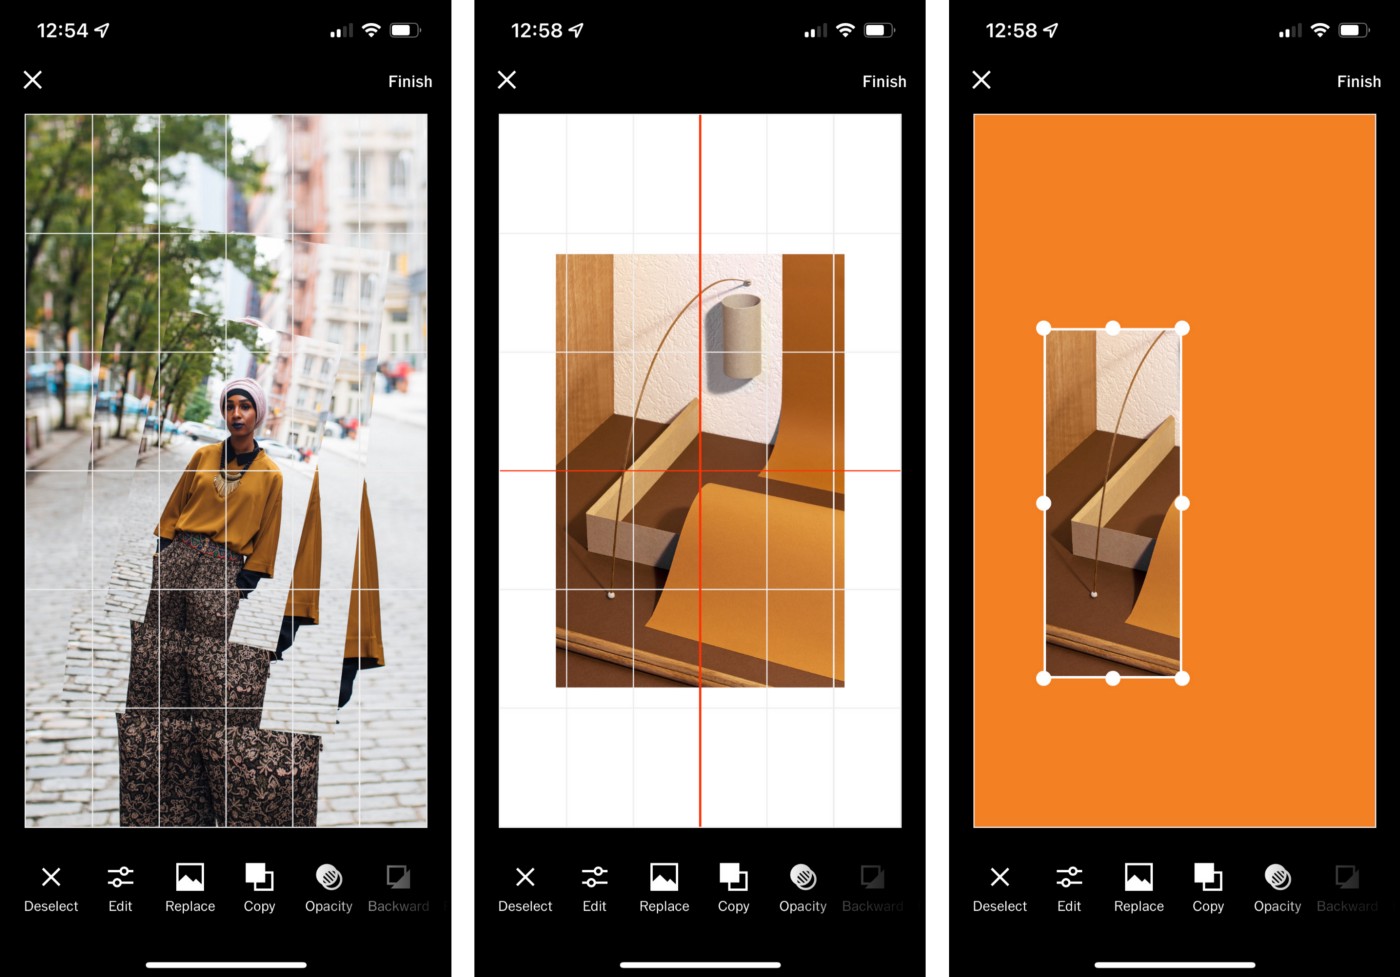
In the default menu (with nothing selected), the Canvas (background) color can be changed, additional media can be added, and various shapes can be added into the collage.

ui showing college editing menu

Selection Options

When an item in a collage is selected, the selection menu appears. Here, individual elements can be edited in a wide range of ways.

editing options ui

Here’s what each option does:

  • Edit: (Image only) Opens the selected image into the image editor
  • Replace: (Image only) Opens the media picker to replace the selected image with another
  • Modify: (Shape only) Opens the shape menu to change the selected shape
  • Copy: Copies the selection, enabling a new “Paste” option from the default menu to add more copies of the selection..
  • Opacity: Adjusts the opacity, or transparency of the selection.
  • Backward: Moves the selection backward in the stack of images, so that it falls behind an overlapping image.
  • Forward: Moves the selection forward in the stack of images, so that it stands in front of an overlapping image.
  • Flip: (Image only) Flips the image vertically, so that what’s on the bottom is on top, and vica versa.
  • Mirror: (Image only) Mirrors the image so that what’s on the left is on the bottom, and vica versa.
  • Delete: Deletes the selection from the collage (but does not delete it from your library).

Through the creative use of these tools, a deep palette of options is available to you, but it can be daunting to get started. With that in mind, let’s explore some tips and tricks to create great collages on VSCO.

Hacks!

While the Collage tool is already powerful, savvy users have found ways to expand even beyond its current capabilities.

1. Shapes as shadows

Credit to Trevor Rosenkilde, a software engineer at VSCO, for this one. First of all, it was discovered that images can be sized down smaller than shapes. To do this, we start by making an all black image to use later.

Getting a solid color image:

  1. Open up Collage (however you want to enter).
  2. Make the canvas blank and pick your color (black is used for this example)
  3. Save collage

Drop shadow time:

  1. Pick your image (ideally an image with an interest point — maybe in the center).
  2. Expand it to the size you’d like (be careful not to lose your control points off screen — you may need to crop to 9:16 before entering Collage).
  3. Copy-paste the image.
  4. Start cropping that newly pasted image to just your interest point. (Careful not to move the duped image. If you do, just delete it and re-copy & paste)
  5. Copy-paste your newly cropped interest point.
  6. Move one of the copy-pasted interest point layers to the side and select the old cropped part.
  7. Hit replace and select the solid color image from earlier.
  8. Now, move the original cropped interest point slightly to offset it from the now black square/rectangle to make it look like a shadow.
  9. From here, you’ll want to add the solid color image to the scene and scale it down as small as possible.
  10. Rotate it 45 degrees and line it up between the corners.
  11. Copy-paste and do the other side.
displaying drop shadows editing
-trevor

2. Shapes as masks

Use a black shape to create a mask by overlaying an image over the shape and reducing its opacity to 20%. By doing this, only the areas of the image that overlay the black shapes will be seen.

examples of using shapes as masks
Explore VSCO
Explore VSCO
Membership Benefits
Unlock access to all 200+ Presets, advanced editing Tools, Video editor and more with VSCO Membership.
Yearly Membership starts at $29.99
Monthly Membership starts at $7.99
Complete library of 200+ presets
Advanced tools including HSL and FX
Collage and Montage
Video Editing
Unlimited Recipes
Create GIFs with DSCO
Start Free Trial
Download VSCO QR code
Download the app to start your
Free 7-Day Trial